<
>
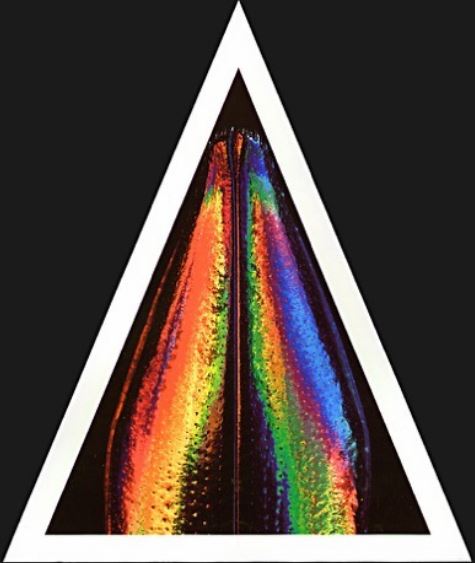
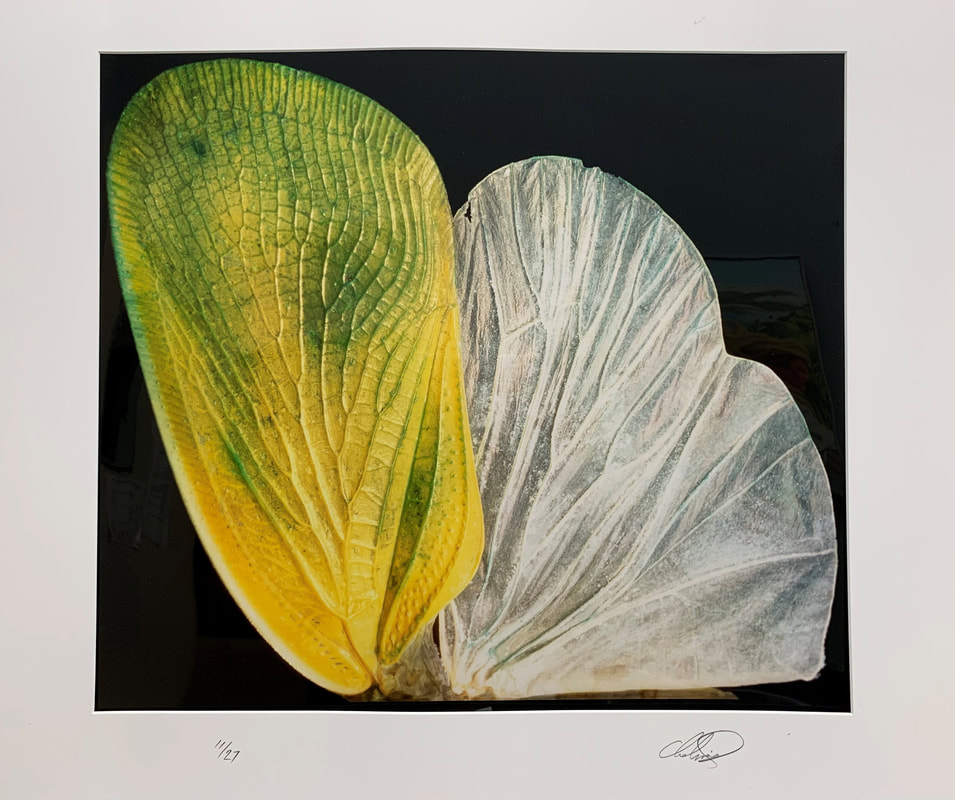
Robert Chelmick is a Canadian photographer, mixed media artist, radio broadcaster and independent filmmaker. He was born in Edmonton in 1949 and grew up in Alberta and Ontario. During the 1970s, he graduated from the Northern Alberta Institute of Technology with a diploma in Radio and Television Arts. He soon became an award-winning radio and television host and producer at CBC, CTV, and CKUA. A pivotal moment in Chelmick’s life happened when he interviewed Canadian author and photographer, Freeman Paterson, in which he felt encouraged to take a new direction in his career and become a visual artist. His photographic works have been exhibited across Canada and internationally, including many of his magnified depictions of nature and wildlife, which have had solo exhibitions. One such series, Flying Colours- Design on Wing, from 1990, which travelled across Canada, is included in the Art Gallery of Algoma’s permanent collection. In 2000, Chelmick founded his company, Chelmick Creative Inc. where he would develop portraiture, design books and CD covers, and photograph products for clients. He eventually took on the role of an independent filmmaker and was commissioned Chelmick to create a documentary based on the life of a Buddhist monk and humanitarian, Acharya Shiv Shankar Dwivedi titled The Three Lives of Panditji. It was released in 2012. During this time, Chelmick also developed his own radio show called “The Road Home”. Since 2002, he has brought together music, poetry, storytelling, and country life while living in the woods with his wife, Janice Beaton and their dogs and horses. While Robert Chelmick originally studied at the Northern Institute of Technology for Radio and Television Arts, he eventually felt encouraged to explore a new direction in his career and become a visual artist, specifically interested in photography. Chelmick’s creative photography is fun, bold, and vibrant, exploring how the light plays with the world, and approaching that through various methods, including scanners. Much of Chelmick’s works are focused on the human body, portraiture, and nature as his subject matter, a good example of this is seen in his photo series Wide Screen where he experiments juxtaposing people with nature. Chelmick also integrates humour into his works, seen in his series Jumping for Joy where he photographed local celebrities jumping in mid-air. In his 1990 series Flying Colours-Design on Wing, Chelmick continued exploring natural themes by using macro photography to capture detailed close-ups of flying insects. These photographs reveal the intricate beauty and details of the creatures that are not as easily seen with the naked eye. Chelmick’s works have been collected by the Alberta Foundation for the Arts, the Provincial Museum of Alberta, the Royal Ontario Museum, and the Art Gallery of Algoma. |
|
|
|
GET INSPIRED
Get Inspired by Magnified Art
Try this creative activity based on the artwork!
Robert Chelmick's Flying Colours-Design on Wing macro photographs of flying insects capture the details and beauty of the creatures close up. Now try your hand at focusing on close up details of different items to create cool magnified art!
SUPPLIES
- Heavy weight paper
- Acrylic paint, coloured pencils, crayons or even collage materials
- Paintbrushes
- Water
- Magnifying glass or camera to assist
- Rag/paper towel for cleanup
INSTRUCTIONS
- Set up an area with your paper, paints and other supplies.
- To start your work you’ll need to look for inspiration. Your work can focus on a feather, a leaf, or any object in your home, you’ll just want to make sure that whatever item you choose that it has a lot of details when you look at the item very closely- you’ll also want to choose an item that you are comfortable painting.
- Take some time to examine your item- look really closely at it, you can use a magnifying glass or even take a photo and zoom in to see even more detail. What kind of details do you see? Does it have texture? Are there more colours you can see in the small details?
- Once you’ve taken some time to look at your item, take a pencil and lightly sketch out the details and textures you see. Remember, you only want to focus on one small section of the item!
- If you are having a hard time focusing on one section, consider cutting a small square out of a piece of paper to create a frame - covering all of your item except the area you want to draw.
- Draw/sketch your item a few times until you feel confident that you have the sketch you like. You can also take this time to explore different sections of the object to try and find the best area for your artwork.
- Once you are happy with your sketch, you can move onto painting your image.
- Start slowly by filling in the base colour of your item and building the tones and colours of the details on top. You’ll want to keep looking at your item, using a magnifying glass or camera again if you want, to make sure you are getting all the details and textures into your painting.
- Once you're happy with your work your painting is done. Now you’ve created magnified art!
- You can stop there or you can explore even more creating a series of close up photos of the same item from different angles or even a whole series of different items.
Don’t forget, there are no mistakes in art! Be bold and have fun!
|
|
Get Inspired by Photography
Try this creative activity based on the artwork!
Robert Chelmick worked across many mediums but focused heavily on macro (close up) photographs. For this activity, we are going to learn how to take extreme close up shots with your camera.
SUPPLIES
- A camera - a DSLR or phone camera will work!
INSTRUCTIONS
- Start looking for inspiration. You can photograph just about anything in your home or outside. Subjects with lots of small details work best for this activity.
- Once you’ve found a subject, take a few practice shots. Many DSLRs and even phone cameras will have macro settings specifically for shooting extreme close ups. If your device doesn’t have this setting, don’t worry, you will still be able to take great close up shots.
- Adjust your framing and make sure that your subject is in focus. Most cameras have auto focus capabilities that can be used by touching the screen or lightly pressing the shutter button on your camera, but if you are a more advanced photographer, you can use your manual focus, and even experiment with your aperture, to get your desired depth of field.
- Make sure that your subject is well lit. Natural lighting is ideal but if shooting indoors or in low light, use your flash.
- Take lots of pictures at different angles. Practice moving your point of focus to different areas of the same subject.
- Remember, move your camera and not the subject. If you are having issues focusing, try moving further away from your subject.
Don’t forget, there are no mistakes in art! Be bold and have fun!
Share your inspired work with us!
Send us an e-mail with your name, photo of your work and the activity it was inspired by and it could be posted on our website!
Please be aware that whatever is posted is widely accessible. The AGA is not responsible for the copyright and has no control of what people will do with the posts.
Please send you submission to: [email protected]
Please be aware that whatever is posted is widely accessible. The AGA is not responsible for the copyright and has no control of what people will do with the posts.
Please send you submission to: [email protected]

